Installation and Configuration
Installation
Installation is simple. Simply run the Server installation package you downloaded and accept the default settings.
If you don’t have Microsoft office, you can use the free office runtime from Microsoft website.
With successful installation, a folder "SavvyPOS v3.0" will be created in your root folder and a start shortcut, SavvyPOS on your desktop.
Installation on clients computers can only be done once the server is properly configured.
Please Note: SavvyPOS Installation/Setup package is not Code Signed so you will get an "Unknown Publisher" Warning during installation.
Configuration
First Start
Click SavvyPOS shortcut on your desktop. The program should start with a warning that the program is not safe. This is a standard warning windows give to application which are not digitally signed.
To prevent the warnings to appear every time you start the program, simply make "SavvyPOS v3.0" folder as safe location. For instruction on how how to create a safe location, please read here.
The program will start with a welcome window as shown below:
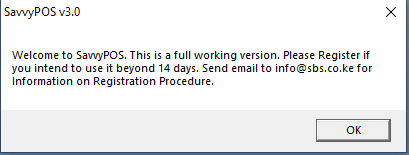
Click the OK button. Another window will open as shown below. This is a registration window that will be appearing during your 14 days trial

If you have the the unlock code, you can enter and click OK. If valid unlock code is entered, the registration window will no longer appear during starting.
If you don't have unlock code yet, simply click any button to begin or continue with your trial.
The Program will start with the Business selection window as shown below.
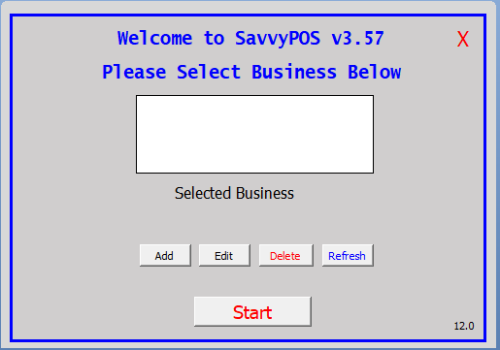
From v3.57, SavvyPOS can handle multiple business entities if located on the same premises and using the same computer.
Creating Data Folder for your Business
To set up your first business, click the "Add" button tha will open another window as shown below:

In the "Serial" box, enter 1 (for your first Business"), and in the "Business Name" box enter your Business name.
In our example above, we entered business name as "ABC Trading". Therefie on restart, the Business Selection window will look as follows:
Then click the search button (with binoculars icon) and navigate to any folder you wish to keep your data files.
Finalize by clicking "Save" button. Then close the app and restart the app.

Select your business and click "Start" button. SavvyPOS will open as shown below.
Program Settings
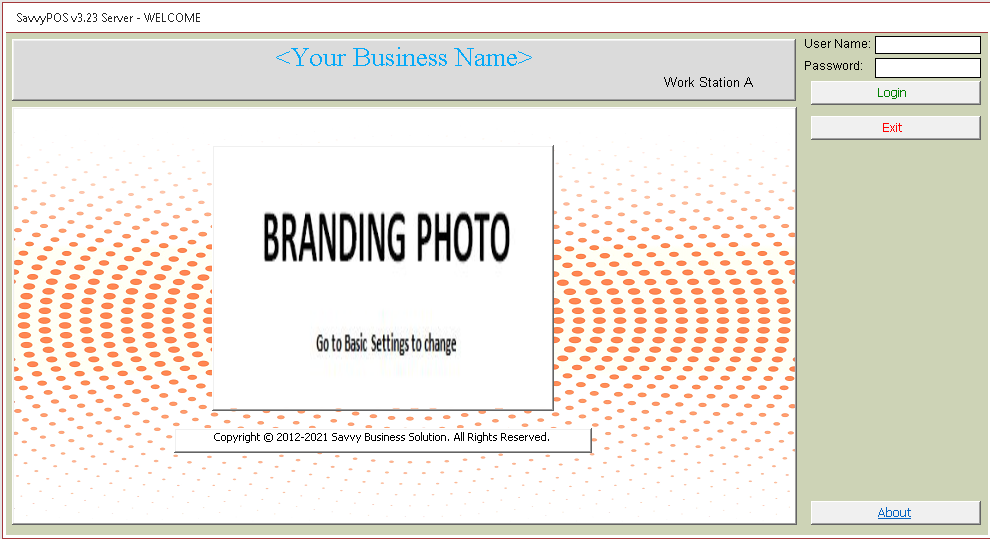
On user Name box, enter "admin" without quotes and on password box enter "123" also without quotes. These are the default credentials for the system administrator. You should change the password but keep the user name as "admin".
Click the "Login" button to login. The welcome window will open as shown below.
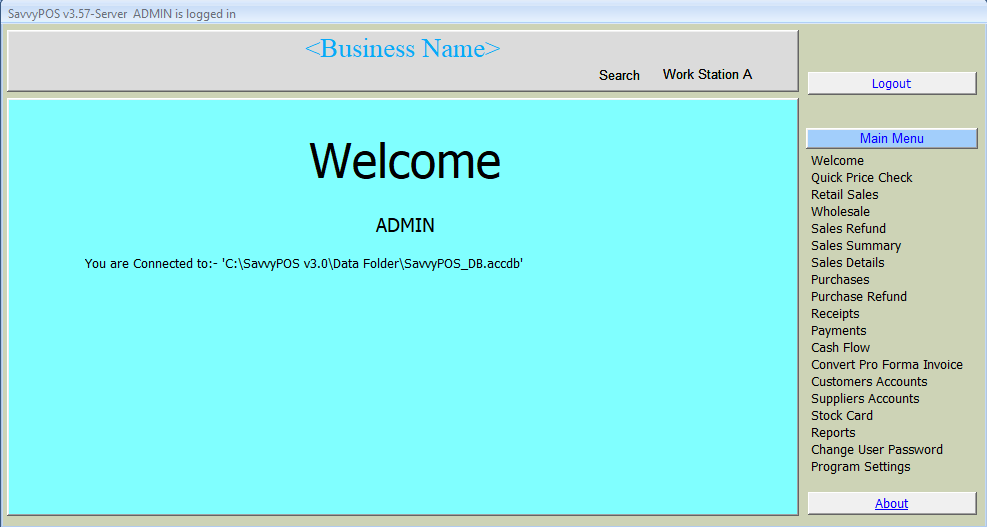
On the side menu, click "Program Settings", the first mandatory settings item will open as shown below.
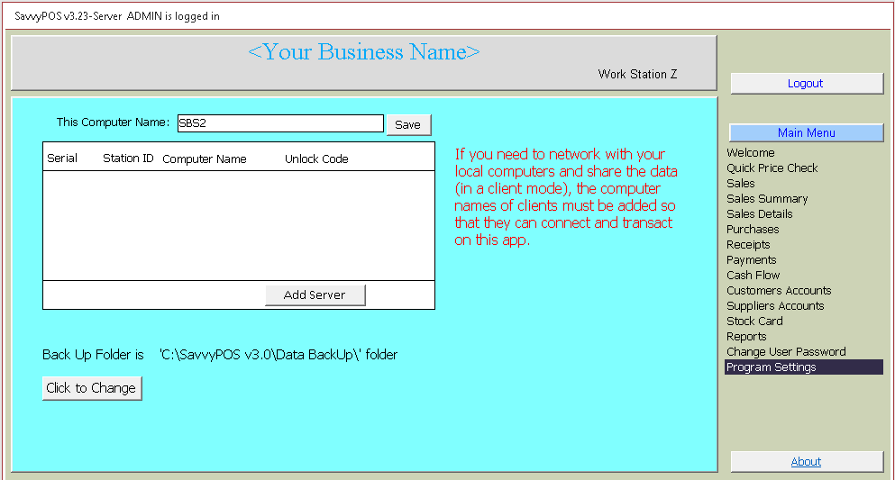
Click the button "Add Server" then refresh the page by clicking "Program Settings" on the menu item.

The center page and the menu list will change as shown above. Note also the work station name has changed from "Z" to "A".
Basic Settings
On the main menu click "Basic Settings" which is on top of the list. The center page will change as shown below.
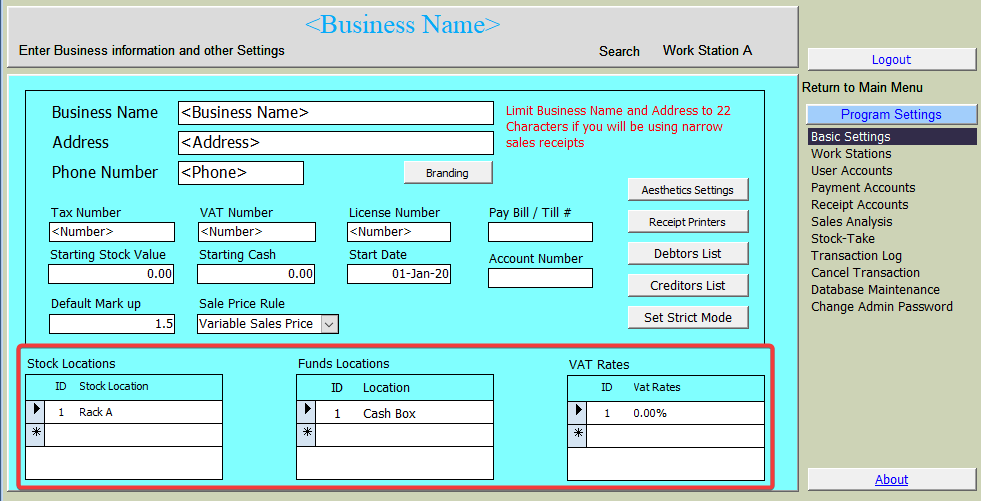
Here you should fill as much information as possible. Leaving any box blank will render some functionalities to fail or display ridiculous information. The most important are those at the bottom, i.e. "Stock Location", "Funds Location" and "VAT Rate". If your business is not required to Pay or Charge VAT, then set one item as o (zero) VAT.
Also note here the default fonts for receipt printer is "Arial". You may have to enter the font name appropriate to your printer.
Sale Price Rule
Another important settings you should set immediately is the sale price rule. The default setting is "Variable Sales Price" meaning you will be entering the actual price you sold the item. For those business that have fixed selling price, they will have to change to "Fixed Selling Price" option. That way the price you set as your selling price can not be changed by the sales person.
When fixed price is set, there may be a requirement to give a discount on the final sale. Anothor setting is provided to either allow discount (by selecting Yes) or not to allow (by selecting No) as shown below:
.
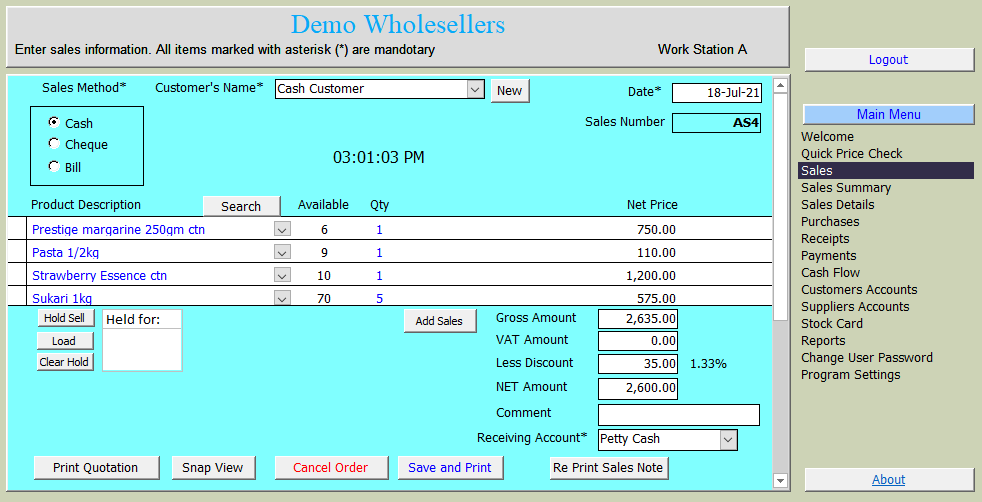
The Sales page for a fixed sales will now look as shown below.
Strict Mode
Strict Mode allows you to force Sales and Purchase Transactions to follow certain rules. Click "Set Strict Mode" button to open another window shown below.
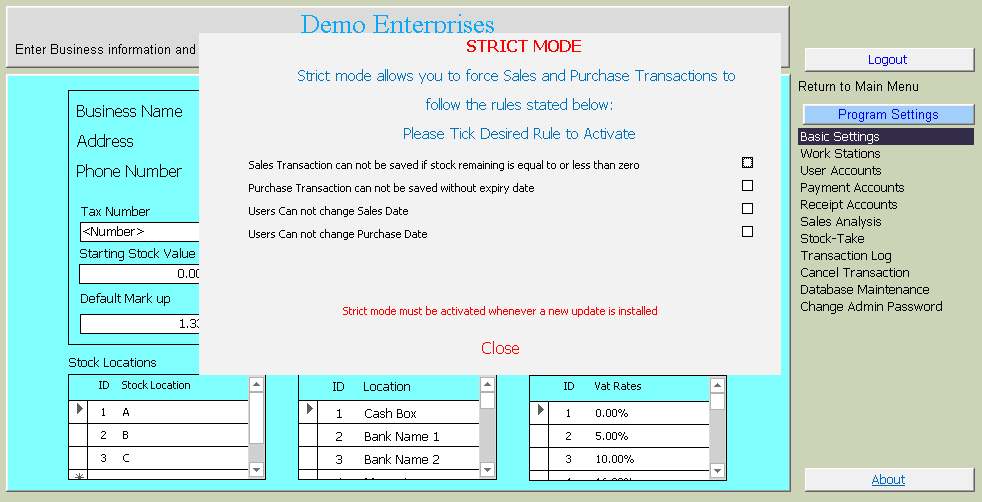
The settings you apply here will apply to all users and all products.
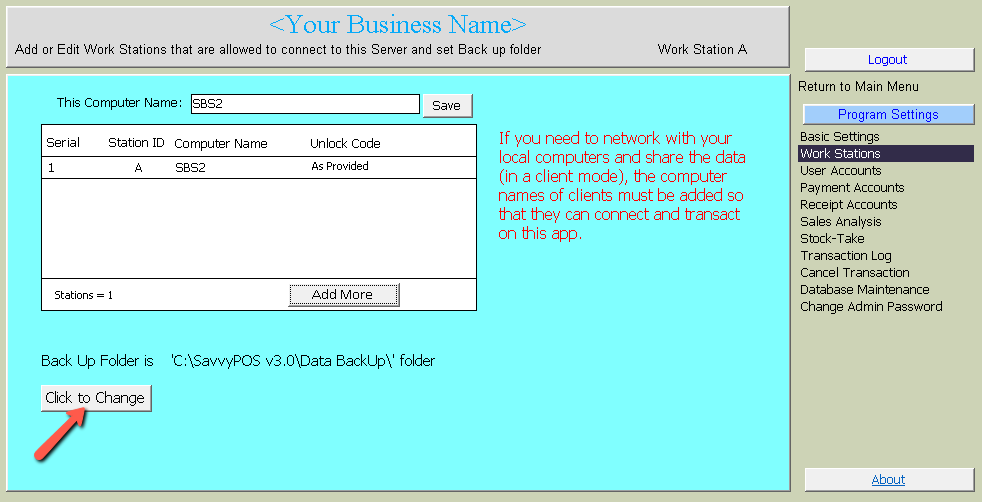
Set Back up Folder
On the main menu click "Work Stations". The default location of a back up folder is as show below. You can click "Click to Change" button and navigate to desired folder which may be on the same computer, external drive or a network location and set as your back-up folder
Add Clients
As mentioned in the introductory section, you can have another computer connected to the server and they can simultaneously access and manipulate the date. A store-man could be adding new purchases while the salesman could be selling. You could also have two or more salesmen posting sales simultaneously.
If you have another computer and you wish to link with the server so that they can work together and be able to read and write the data to your server, click "Add More" button on the center page.
Another Window will pop up as shown below.
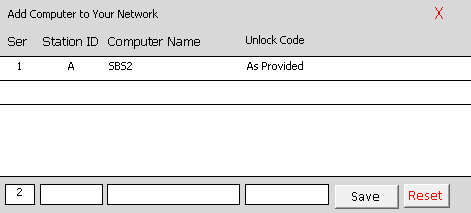
Fill desired letter ID from "B" to "Y", computer name as shown and unlock code (issued after paying registration fee) for the client computer. Remember the letter "A" has been taken by the Server (the computer you are making these settings). Letter "Z" is not used. It is a default letter for non connected clients. Note also the serial number is already entered as 2.
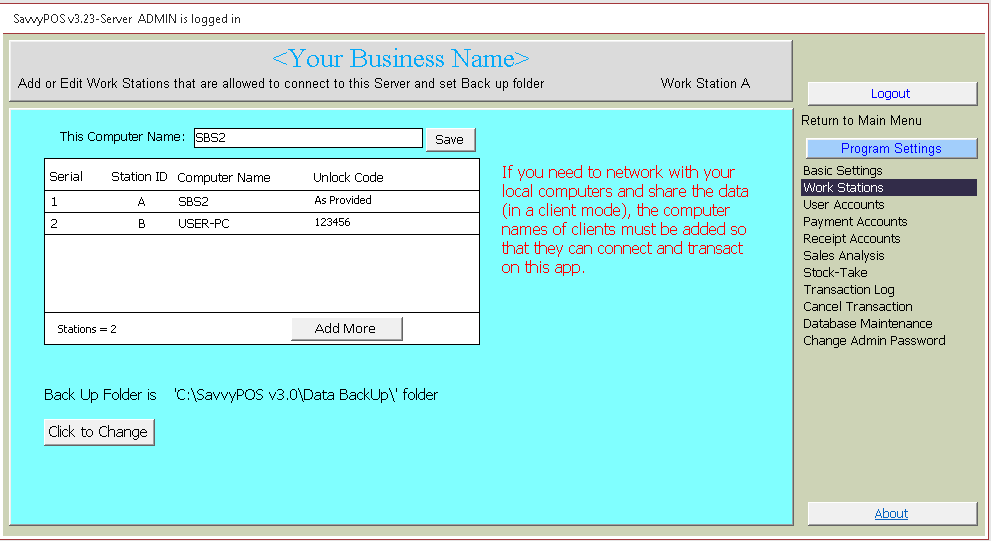
Click "Save" to register the client. Notice the added work station now appears below the server as shown below. Note also serial 3 is now waiting to be filled
If you made any errors in the computer names (which must match exactly as indicated in the system setting), you can click "Reset" button and set them afresh.
The number of work station you may add will depend on the registration fee you paid.
User Accounts
If you are done with work stations, the next important settings is the names of the users of this program. You will need to add their names and give them access to pages (corresponding to names on the main menu) they can open and do transactions.
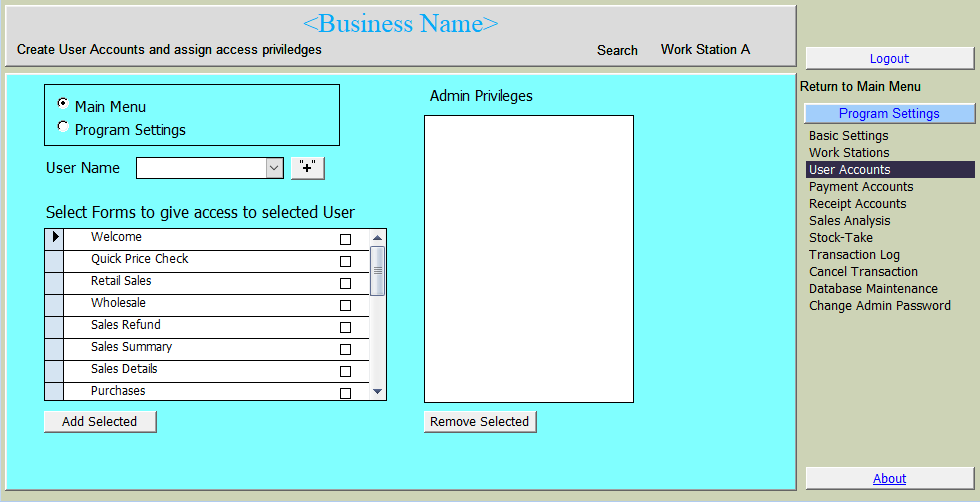
Click "User Accounts" on the main menu. The center page will change as shown below.
On the Privileges side click the "+" button to open another window as shown below.
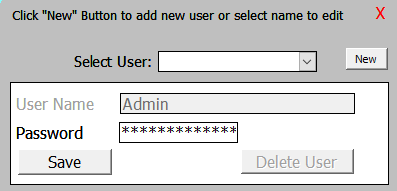
Then click the "New" button. The User Name box will become clear (empty). Fill the name of user and click "Save" button. You may add as many user names as you wish. Close above window and return to underlying window below.
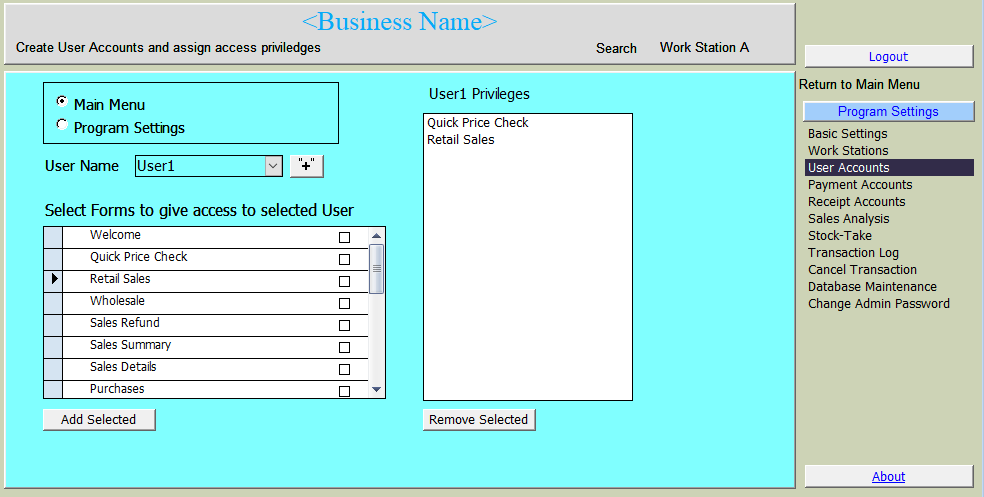
Then Select the name from "User Name" selection box above. Then from "Select Forms ..", select by ticking the box against the desired forms you wish to allow the selected user.Then click "Add Selected" button. The selected forms will be accessible to the user. In our example, we call "User 1".
Payment Accounts
Payment Accounts names are any account names that you use to record your expenditure other than your stock purchases. It could be your fuel expenditure, rent, wages, repairs, creditors, etc.
On the main menu, click "Payments Accounts". The center page will change as shown below.
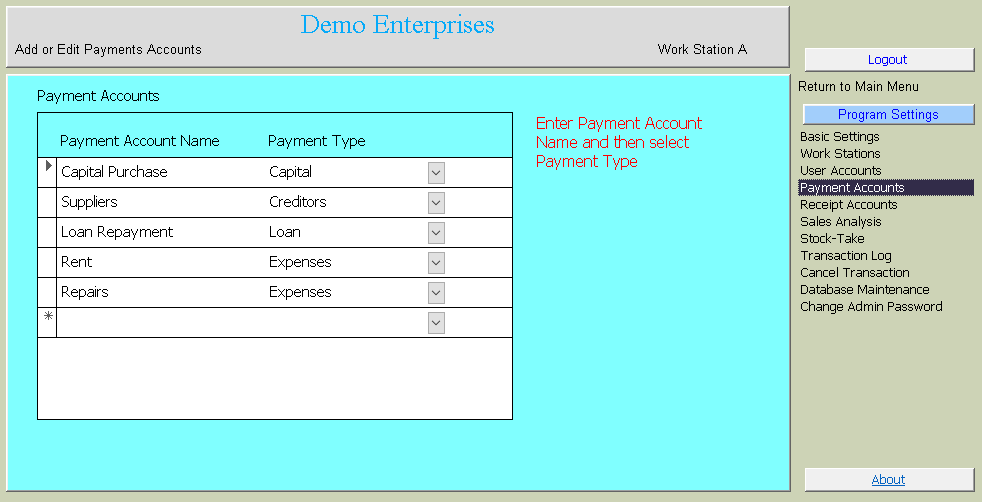
Under Payment Name enter your desired names and under Payment Type select from the preset categories.
Receipt Accounts
Receipt Accounts names are any account names that you use to record receiving money other than sales. It could be your receipt from debtors, service fees, etc.
On the main menu, click "Receipt Accounts". The center page will change as shown below.
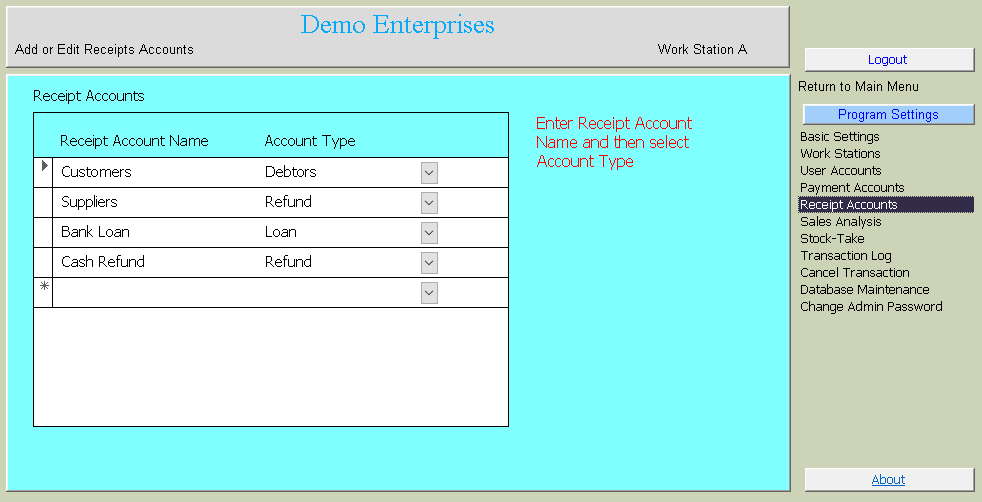
Under Account Name enter your desired names and under Account Type select from the preset categories.
Change Admin Password
To change password for the admin user click "Change Admin Password" on the main menu. The center page will change as shown below.
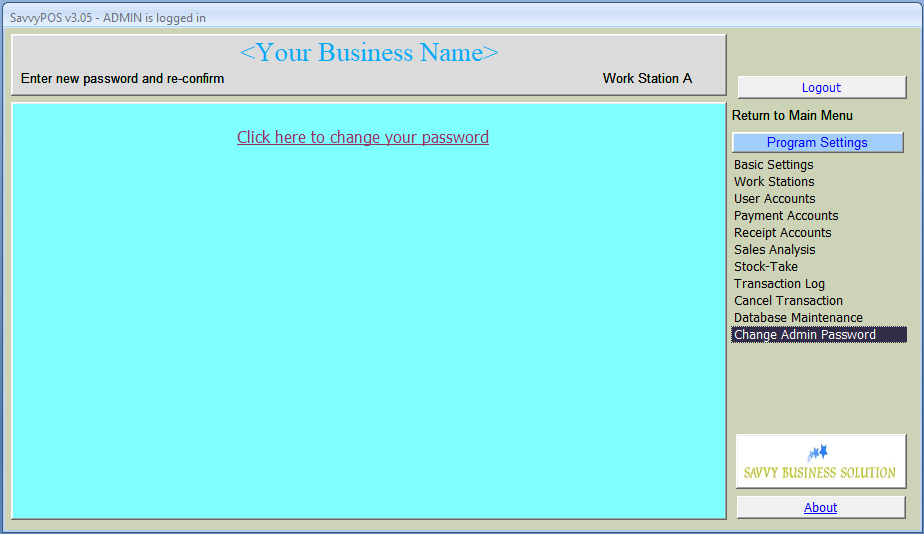
Then click on the words "Click here to change your password". The pop up form will prompt you to enter new password twice.
Load Stock Items
To start using your application, you will need to have items into the database. You can start by adding product list through purchase page or you can load your existing stock list into the database.
To load your stock list click "Database Maintanance" on the main menu. The center page will change as shown below.
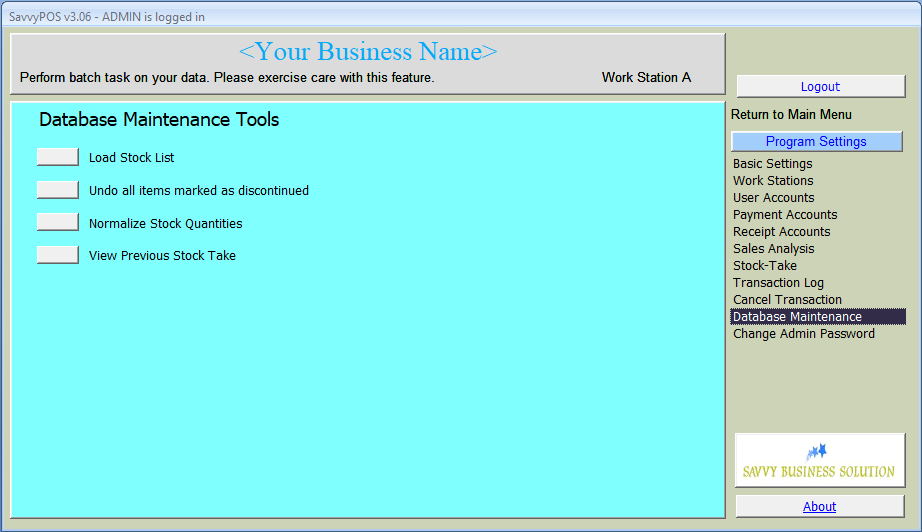
Click "Load Stock List" button. Another window will pop up as shown below.
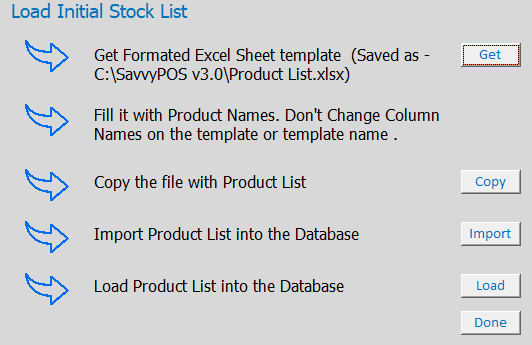
Follow the 5 steps to load your stock list. Start by clicking the "Get" button. This will create a spreadsheet file in your installation folder. Fill the spreadsheet (shown below) without changing the headings. You can even copy from your excisting record if available and then paste the data in to that file.
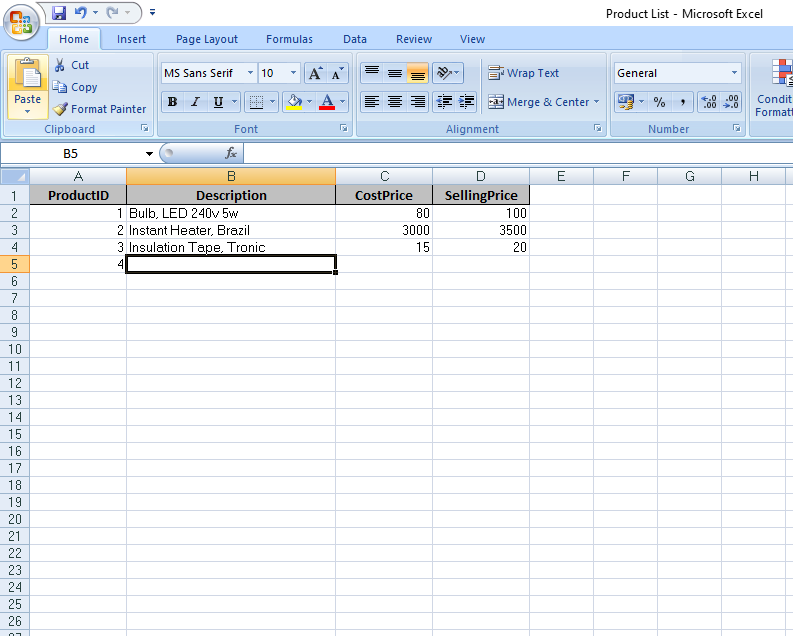
In the first column ProductID, simply enter contious number begining with number 1 (one). In the the description column, enter the product name (e.g Bulb, LED 240v 5w). Fill the Cost and Selling price column if possible and save and close the list without changing the file name and file location.
Then click the "Copy" button. By default windows will open your instalation folder where your spreadsheet file is located. If windows opened a different folder, please navigate to your installation folder and select the list you created (Product List) and click open.
Then click "Import" button to import the file into your database. If the import is successful, you will get the message saying so many product names imported. In our example below, 3 products have been successfully imported
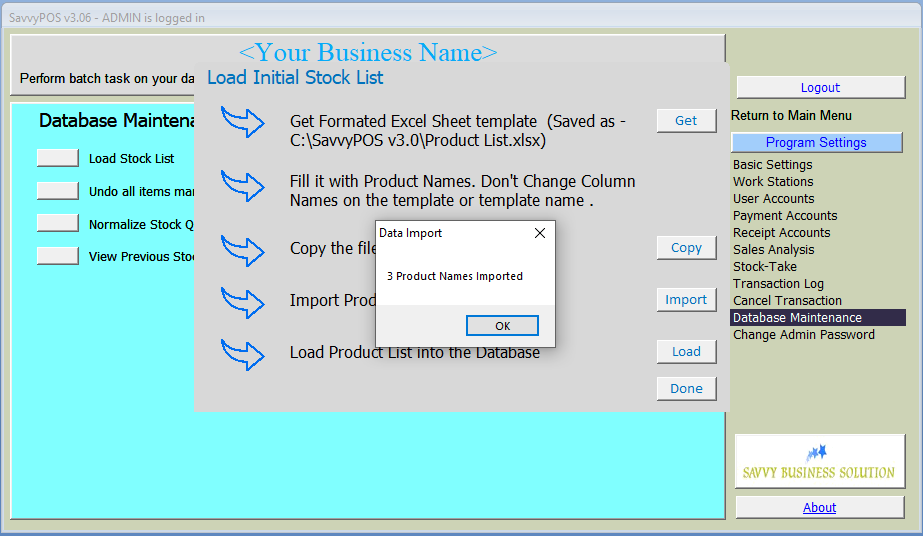
Click OK to close the message then click "Load" button to make your list just imported a working list. Just like for import, the load button will return a message saying so many product names successfuly loaded.
Click OK and then "Done" button to close import form.
That brings to the end of our configuration exercise. You will still need to add other information such as product location and product category in order to enjoy full features of the software. Likewise if you are dealing with perishable or expiring products you will have to add that information as well.
You may now proceed to Using SavvyPOS Page
Adding another Work Station
If you need to add another work station, first contact Support for download link. Then download the client installation package which will come with detailed instructions on how to connect to your server.
The installation package will install "SavvyPOS v3.0" folder on your root folder. The installed folder will contain all required files for the client works station to connect to the server.
Then follow the same steps to connec to the folder containing the Data Folder you created on the server work station.
Starting the Client Work Station
The client work station will start without prompting for registration key, as long as it is duly registered in your server.